Ingredients
Instructions
- Bloom the yeast. In a large bowl, whisk together the warm water, yeast, and honey. Let it sit about 5 minutes — you're looking for a foamy layer on top. That foam is the yeast waking up and eating breakfast. If nothing happens after 5–10 minutes, your yeast is dead; throw it out and start over with new yeast. See the "Why the Sweet Stuff" callout below for why the honey is not optional.
- Add the dry stuff. Dump the flour, salt, 1 Tbsp olive oil, rosemary, thyme, garlic powder, and onion powder into the bowl. Mix by hand — a whisk, a rubber spatula, a big wooden spoon, whatever's in the drawer. It will forgive you. Mix until it looks like a shaggy dough that pulls away from the sides of the bowl. If it's still sticking to the bowl like it lives there, splash in a little more olive oil.
- Cover, rest 15 minutes. A clean kitchen towel over the bowl, or a lid if the bowl has one. Set a timer and go do something else.
- First stretch-and-fold. Pick the dough up out of the bowl, pull one side up and over the rest, rotate the whole thing, and repeat 3–4 times. Put it back in the bowl. Do not skip this. This is not decorative. See the stretch-and-fold callout below for what it's actually doing.
- Cover, rest 15 more minutes.
- Second stretch-and-fold. Dampen your hands with a little water to keep the dough from welding itself to your fingers. Pick it up, stretch it around a few times, same motion as before. Return to the bowl.
- Cover, rest 1 hour. Yes, a full hour. This is where the yeast does its actual work. Go do something else. Grill some chicken. Pick some basil.
- Prep the sheet pan. Line a rimmed baking sheet with parchment. Coat the parchment generously with olive oil. Not cooking spray. Not butter. Olive oil. See the olive-oil callout below if you're tempted to shortcut this.
- Place the dough on the sheet, roll it in the oil. Get every surface of the dough coated. This is friend, not foe, for the next hour of resting and the final bake.
- Cover with a second sheet of parchment, then a second baking sheet on top. This flattens the dough slightly and keeps it from ballooning during the second long rest. Weird move, works great. Rest another 1 hour. (Last long rest — I promise.)
- Remove the top baking sheet and top parchment. Preheat oven to 440°F.
- Spread the dough on the parchment. Gently push it out to fill more of the sheet. It should be cooperative at this point. Roughly rectangular is the goal, not a geometry proof.
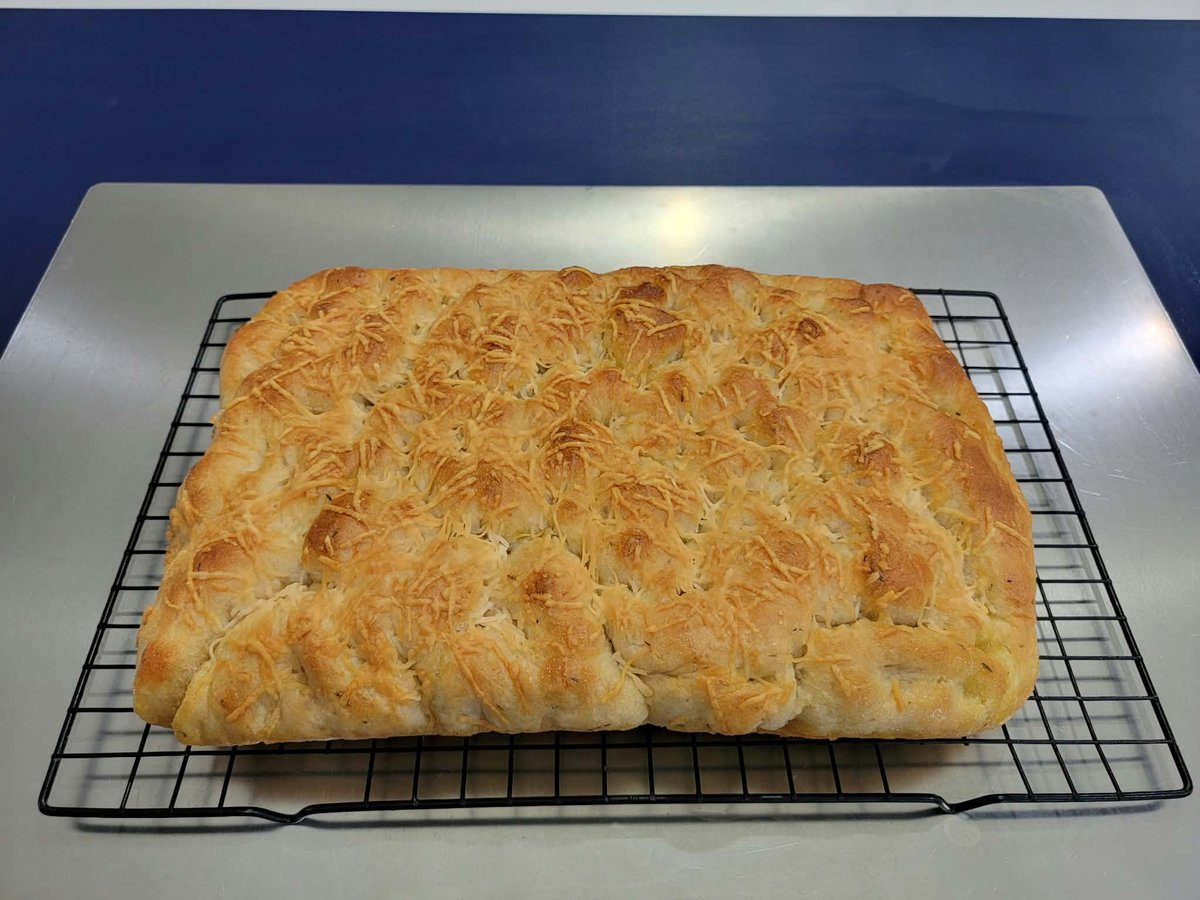
- Dimple the top. Poke your fingers straight down into the dough at spots all across the surface. Not too deep — you're making shallow dents, not holes to the parchment. Halfway through the dough. See the dimples callout below; this is the signature move of focaccia and you are absolutely supposed to be doing it with your fingers.
- Sprinkle shredded parmesan across the top.
- Bake at 440°F for about 15 minutes. Golden brown on top, browned cheese, should look like the photo. If it needs another 2–3 minutes, give it that. Every oven's a liar; the color is the truth.
- Cool on a rack. Slice and eat, or use it for a Focaccia Sandwich — that's over on the next page.
Why the Sweet Stuff (Yeast Is Alive and Yeast Is Hungry)
Yeast is a living organism. It's a fungus, technically. And like every living thing, it needs food, and its food is sugar. That teaspoon of honey (or granulated sugar, or brown sugar — all fine, all interchangeable at this quantity) is yeast breakfast. The yeast eats the sugar and produces two things as byproducts: CO2, which is what makes the bread rise, and a small amount of alcohol, which cooks off in the oven.
Skip the sugar and the yeast is on a hunger strike. It activates way slower, the rise is weaker, and the finished bread is denser and sadder. This is not optional. It is also not a huge amount — one teaspoon does not make the bread sweet; the flour dilutes it into invisibility. You are feeding the yeast. That is all this ingredient does.
Fun bonus: yes, this is the same reason beer and wine work. Same yeast, same job. You are basically making very short, un-alcoholic beer, and then baking it before it can ferment.
Why the Stretch-and-Fold (You're Developing Gluten Without Kneading)
The stretch-and-folds between rests are not a "vibes-based" step. They're doing real work. In traditional bread, you develop gluten — the protein network that gives bread its structure — by kneading for ten minutes, working the dough hard against the counter. In this recipe, we're doing it a different way: rest, gently stretch, rest again.
Each rest lets the gluten strands hydrate and relax; each stretch aligns them, strengthens them, and builds the network. Two or three cycles of stretch-and-fold with rests between accomplishes what ten minutes of kneading would, without you having to actively knead anything. This is the whole magic of no-knead bread — it's not "no gluten development," it's "gluten development that happens while you're doing something else."
Skip the stretch-and-folds and you get a dense, tight, un-airy loaf that never quite rises right. Do them and you get the tender, chewy, pockety focaccia the photo shows. This is the one step that separates "bread" from "flat sad slab."
Olive Oil, Not Cooking Spray. This Is an Italian Dish.
Olive oil is a flavor ingredient in this recipe, not just a pan-release. It flavors the crust. It gives focaccia its characteristic taste. Cooking spray, no matter how good the label pretends to be, is not olive oil — it's a soybean-oil-and-propellant emulsion designed for eggs and non-stick pans, and it will make your focaccia taste like eggs and a non-stick pan.
Do not do it. Buy a bottle of decent olive oil. It doesn't have to be the fancy $30 stuff; a mid-range bottle from the grocery store is fine. Use it generously. This is what Italian bakers have been doing for centuries. Do not out-clever centuries.
Dimples Are Non-Negotiable. Poke the Dough.
You are supposed to poke your fingers into the top of the dough right before it goes in the oven. This is not a joke and it's not decorative. The dimples create little pools that hold the olive oil (which coats the top for flavor) and any toppings that would otherwise slide off during baking. They also give focaccia its signature uneven surface — that's the look.
If you're worried you're doing something wrong, you're not. Push your fingertips in until they're about halfway through the dough. Not through to the parchment. Not just a scratch. Halfway. Then leave it. The dimples stay through the bake and end up as the visible pockets across the top of the loaf.
It Will Forgive You
Unlike some breads that demand a stand mixer, a dough hook, exact temperatures, and a religious ceremony, focaccia is genuinely forgiving. If you overmix a little, it's fine. If you use a whisk when it should have been a spoon, it's fine. If your kitchen is a bit cool and the first rise takes longer than an hour, it's fine — just let it go until it looks doubled. If your dough is a little wetter or drier than you expected, adjust with a splash of oil or a spoonful of flour and move on.
The one thing you actually cannot skip is the stretch-and-fold sequence (see that callout). Everything else, focaccia will let you get away with.